Mac and cheese – it’s the comfort food that hugs your soul, isn’t it? Seriously, is there anything better than scooping up a spoonful of creamy, cheesy goodness on a dreary day? If you’re nodding your head right now, then you’re in for a treat because we’re about to dig deep into one of the most iconic versions of this dish – Paula Deen’s Mac and Cheese.
Why hers, you ask? Paula Deen’s recipe isn’t just your run-of-the-mill dish; it’s like a warm blanket in a bowl. Whether it’s a family gathering, a potluck with friends, or just a Tuesday-night dinner, this mac and cheese fits the bill. It’s legendary for a reason, and in this article, we’ll explore why her version is pure culinary magic. Trust me, once you’ve tried it, there’s no going back.
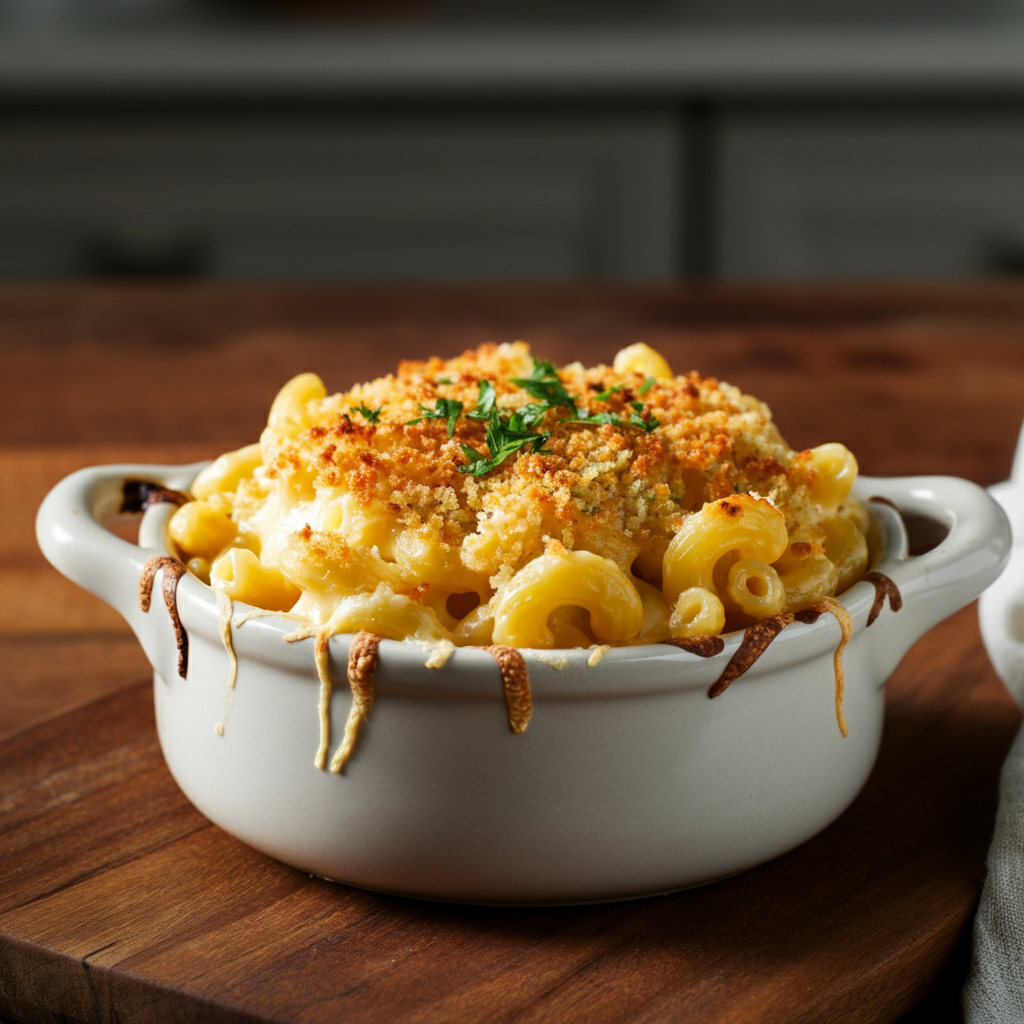
But before we get into the nitty-gritty, close your eyes for a second (not literally, or you won’t be able to read this), and imagine it. Lush, creamy pasta smothered in cheese, baked to perfection with that golden, crispy crust. It’s the stuff of dreams, I tell you. Now that I’ve got your taste buds tingling, shall we get started? 😋
The Magic of Paula Deen’s Mac and Cheese
 Why Paula Deen’s Mac and Cheese is a Classic
Here’s the thing about food – the simplest dishes are often the hardest ones to get right. A classic mac and cheese isn’t fancy. It doesn’t call for exotic ingredients or a degree in culinary arts. But what makes Paula Deen’s version stand out is its ability to make even the simplest ingredients feel extraordinary.
What exactly makes it so special? Well, first off, Paula’s recipe strikes the perfect balance between creamy and cheesy. You know how some mac and cheese dishes end up too dry, while others are so mushy they lose all their charm? Not this one. Her method delivers a texture that’s just right – thick enough to be satisfying but not so heavy that it feels like you’ve eaten a brick.
And then there’s her unique layering technique. It’s like building a cheesy lasagna, with every layer bringing with it more excitement. The result? Every bite is an explosion of flavor that keeps you coming back for more.
Key Features That Make It Unique
Okay, so every good recipe has that “it” factor that sets it apart, right? Paula’s mac and cheese has more than one. Here’s a sneak peek at what makes it special:
- The Cheese Blend: While most recipes stick with cheddar and call it a day, Paula tosses in a medley of cheeses for a more complex flavor profile. Think cheddar, mozzarella, and Parmesan working together in cheesy harmony.
- Egg Custard Base: This might surprise you, but instead of just tossing cheese and milk together and hoping for the best, Paula uses a custard base to bind everything together. The result? A lush, creamy texture that holds up even after baking.
- The Crunchy Top: You know that golden, bubbly crust that tastes like heaven? Paula’s method ensures you get that every time. A sprinkle of shredded cheese on top before baking creates a crust that’s crispy without being dry.
“Mac and cheese isn’t just food; it’s a mood. And Paula Deen’s mac and cheese? That’s happiness baked into a casserole dish.”
Ingredients You’ll Need
A Look at the Key Ingredients
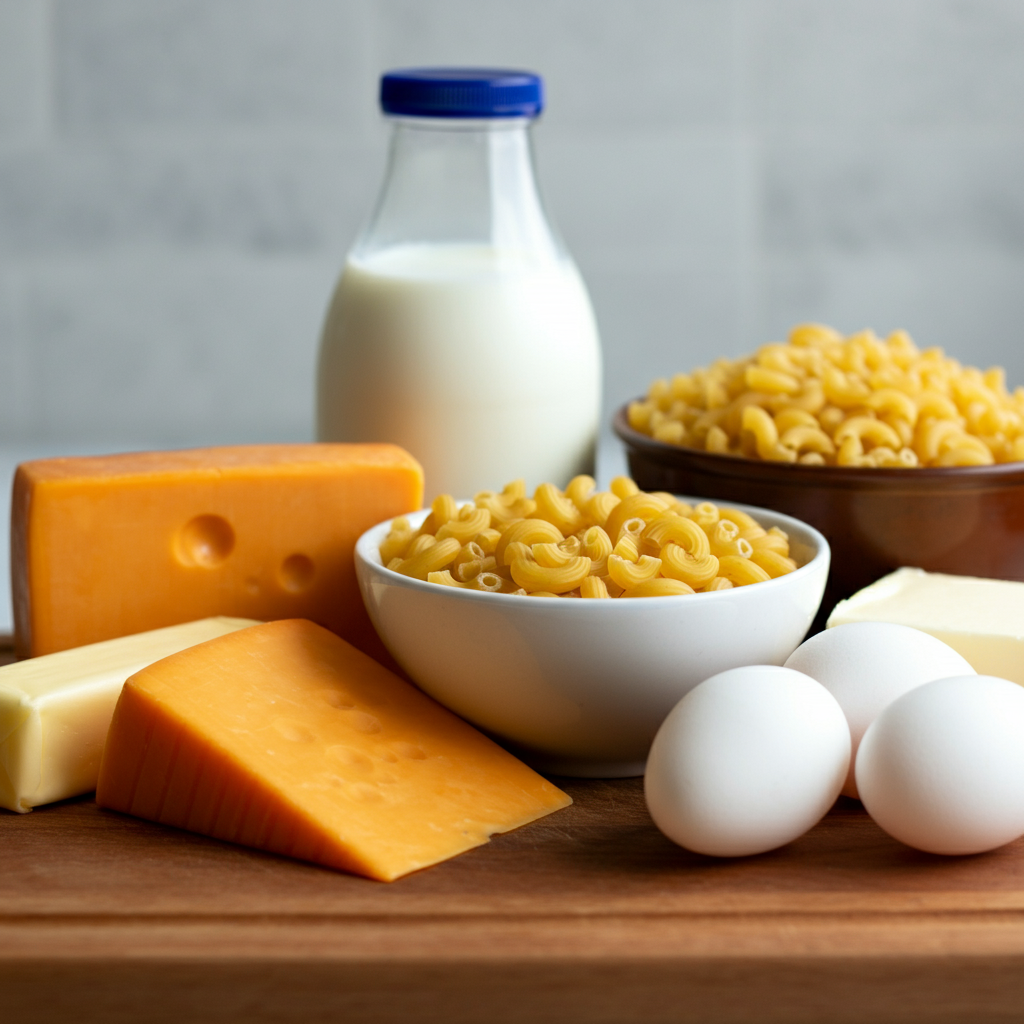
Alright, so what goes into creating this magic, you ask? The beauty of this recipe is that it doesn’t require a long, complicated shopping list. If you’ve got a fridge and pantry stocked with the essentials, you’re already halfway there. Here’s what you’ll need to gather for Paula’s masterpiece:
- Elbow Macaroni: The classic choice for mac and cheese because its curved shape holds onto that sauce like a clingy best friend (and we’re thankful for it).
- Cheddar Cheese: Sharp, creamy, and oh-so-cheesy – it’s the star of the show.
- Mozzarella Cheese: This adds that stretchy, gooey factor we all love.
- Parmesan Cheese: A little touch of sophistication that elevates the dish.
- Eggs: These bind the ingredients together into that luscious custard base.
- Milk and/or Heavy Cream: For creaminess, of course.
- Butter: Because every good recipe starts with butter, doesn’t it?
- Seasonings: A little salt, pepper, and maybe a pinch of paprika for some extra oomph.
And the best part? No weird, hard-to-pronounce ingredients here. Just good, old-fashioned staples that you probably already have at home.
“You don’t need a fancy pantry to make Paula’s mac and cheese. All you need is a bit of love, some cheese, and maybe a stretchy pair of pants.”
Common Ingredient Substitutions
Not everyone’s fridge looks the same, and that’s okay. Can’t find mozzarella? No sweat. Swap it for Monterey Jack or gouda. Running low on heavy cream? Use whole milk or even evaporated milk instead. And if you’re trying to cut back on carbs (though why would you when mac and cheese is on the menu?), you could try cauliflower as a base.
Paula wouldn’t judge – after all, cooking is all about making the recipe work for you. Just don’t skimp on the cheese. That’s where the magic happens. ✨
 Step-by-Step Guide to Making Paula Deen’s Mac and Cheese
Alright, you’ve got your ingredients laid out, and you’re ready to channel your inner Paula Deen. Are you excited? Because I am! Making this mac and cheese recipe is like painting a masterpiece–except your canvas is a casserole dish, and you’ll be devouring the art when it’s done. 🤤
Follow along, and don’t worry because I’ll guide you through every delicious step. By the end, your kitchen will smell incredible, and your taste buds will be doing a little happy dance. 🧀
Preparing the Perfect Cheese Sauce
First things first – that cheese sauce is the heart and soul of this dish. Without it, you’ve got nothing but naked macaroni. And what’s that worth? Nada.
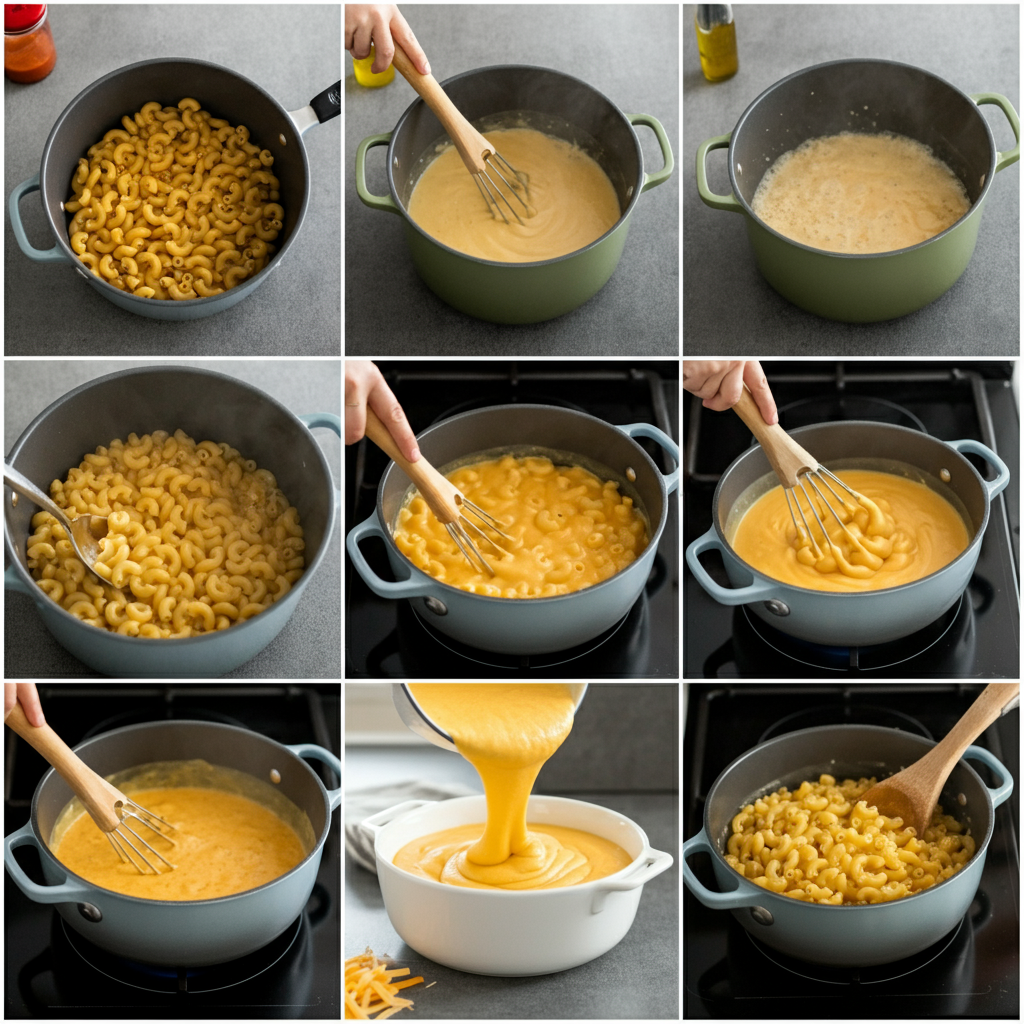
- Melt the Butter: Start by melting that glorious golden butter in a saucepan over medium heat. Can you hear it sizzle already? That’s the sound of something amazing cooking.
- Create a Roux: Stir in a bit of flour until it forms a paste. This step is crucial because it’s what thickens the sauce. Imagine it as the glue holding the cheese goodness together.
- Add Milk or Cream: Slowly pour in your milk or cream, whisking constantly. Don’t rush this part–take your time and make sure there are no lumps. You’re aiming for a silky, creamy base.
- Introduce the Cheese: Now for the best part! Gradually toss in your shredded cheeses, stirring until they melt into a smooth, velvety sauce. It’s like watching magic happen in your pan.
“If the sauce looks too good to wait for, feel free to sneak a taste. No judgment here; I do it too!”
Combining Layers for the Ultimate Flavor
This is where the magic happens—layering! Think of it as building a cheesy fortress, one layer at a time.
- Cook Your Pasta: While you’re making the cheese sauce, boil your elbow macaroni until it’s al dente. Remember, you’re aiming for “just right” with a bit of bite because it will soften more as it bakes.
- Layering Up: Grab your baking dish and start with a layer of pasta. Drizzle it generously with your cheese sauce, making sure every single piece is coated. Repeat these layers until you’ve used up all the pasta and sauce.
- Top It Off: Finish with a generous topping of shredded cheese. This step is crucial for that golden, crispy crust we all love.
“Building a layered mac and cheese is like stacking happiness—no matter how high you go, every layer delivers joy!” ✨
Baking Tips for a Golden, Crispy Top
Here comes the easy part–baking. Slide that masterpiece into a preheated oven at around 350°F and bake it for about 20-30 minutes. The goal is to get the top bubbly and golden without overcooking. Keep an eye on it during the last 5 minutes to avoid burning the edges. And hey, if you’re feeling fancy, you can even sprinkle some breadcrumbs on top for extra crunch!
When you pull it out of the oven, give it a moment to rest (if you can resist). This lets the custard base firm up slightly, making it easier to slice and serve.
“Fresh out the oven, this mac and cheese smells like a warm hug. Just try to keep the forks at bay long enough to plate it!”
 Common Problems and How to Solve Them
Sometimes, even with a perfect recipe, life happens, and things don’t go as planned. But don’t worry–I’ve got your back. Here are some common hiccups and tips to fix them before they ruin your cheesy perfection.
Overcooked or Undercooked Pasta – Finding the Balance
Ah, pasta. It’s either too soggy or too firm if you’re not careful. The trick here is timing. When boiling your macaroni, aim for “al dente” perfection. This means the pasta should have a slight bite because it’ll continue to cook in the oven.
Made it too soft? 😅 No biggie. You can balance it out by using slightly less sauce, so the texture doesn’t get too mushy.
Preventing Dry or Gritty Texture
Ever taken a bite of mac and cheese and thought, “Why does this taste like sand?” That’s what happens when cheese sauce goes gritty. The culprit? Probably too much heat. Cheese doesn’t like being pushed around by high temperatures, so always melt it gently at medium or low heat.
If your mac and cheese turned out a bit dry, try this hack next time: mix a splash of milk into the dish before baking. It keeps everything creamy without messing up the flavor.
What to Do if the Sauce is Too Thin or Clumpy
Nobody wants a soupy mac and cheese. If you find your sauce is too thin, thicken it with a bit of roux or cornstarch slurry. Just whisk it in gradually, and you’ll be back on track in no time.
Clumps giving you grief? That’s just the cheese refusing to cooperate. Try grating it finely before mixing, and always stir continuously to maintain a smooth texture.
“Mac and cheese mishaps happen, but they’re all fixable. After all, cooking is just a series of delicious experiments, right?”
With this guide, you’re set up for success. Next, we’ll explore some creative variations to surprise your taste buds. But for now, bask in the glory of knowing you’ve mastered Paula Deen’s legendary recipe. 🙌
Who says mac and cheese has to stay the same every time? Sure, Paula Deen’s version is already a showstopper on its own, but sometimes, it’s fun to put your own spin on things. Think of it as adding a little flair to an already fabulous outfit. Whether you’re looking to make it heartier or sneak in some veggies, the possibilities are endless. Let’s get creative! 🎨🧀
Adding Protein for a Heartier Dish
Craving something a bit more filling? Adding protein to your mac and cheese can transform it into a one-dish wonder. Consider tossing in these options for a boost of flavor and texture:
- Grilled Chicken: Dice up some seasoned chicken and fold it into the layers. It adds a savory touch that pairs beautifully with all that cheese.
- Crispy Bacon: Because bacon makes everything better, right? Sprinkle crispy bacon bits throughout for a smoky, salty bite.
- Seafood Twist: Feeling fancy? Try adding lump crab meat, shrimp, or even lobster. Think of it as mac and cheese that’s gone on a luxurious vacation by the sea. 😍
“Adding protein is like giving your mac and cheese a best friend—it just complements the dish perfectly.”
Creative Ways to Incorporate Vegetables
Okay, veggie lovers, I see you. You might be wondering, “How can I make mac and cheese a little healthier without sacrificing its indulgent vibe?” Easy! Here are some ways to sneak in some greens, or even disguise them for the picky eaters in your life:
- Broccoli: Steam it first, chop it up, and mix it right in. That cheesy goodness will coat every floret like a dream.
- Spinach or Kale: These leafy greens wilt beautifully and bring a pop of color to your dish. 🥬
- Butternut Squash: Puree cooked squash and blend it into the cheese sauce. It adds sweetness and gives the sauce an extra creamy texture.
Pro tip? If you’re dealing with veggie skeptics, start small! Use a light hand when adding them until everyone’s taste buds catch on. 😉
Pairing Suggestions for Paula Deen’s Mac and Cheese
You’ve got your rich, indulgent main dish ready to go. Now the question is, what do you serve with it? Think of mac and cheese as the star performer—it deserves a solid supporting cast!
Side Dishes That Complement Perfectly
Here are some sidekick options that won’t steal the spotlight but will make the whole meal sing in harmony:
- Fresh Salad: A crisp, refreshing green salad with a tangy vinaigrette cuts through the richness of the cheese. It’s like yin and yang on your plate.
- Roasted Vegetables: Caramelized Brussels sprouts, green beans, or carrots add texture and balance.
- Cornbread: Soft, buttery cornbread on the side just feels like the warm hug you didn’t know you needed.
“Pairing mac and cheese with the right side dish is like creating a playlist where every song flows perfectly into the next.”
Beverage Pairings to Elevate the Experience
And what’s a good meal without the perfect drink to wash it all down? Whether you’re a casual eater or a gourmet connoisseur, there’s a pairing for everyone:
- For the Adults: A chilled white wine with crisp notes, like Chardonnay, complements the cheese richness without overpowering it. Prefer beer? Try a light ale or pilsner for a refreshing contrast.
- For Everyone Else: A glass of iced tea or sparkling lemonade adds just the right touch of sweetness and acidity.
Whatever you choose, raising a glass to homemade mac and cheese makes everything taste better. Cheers! 🥂
Tips for Storing and Reheating Leftovers
Now, I get it—you made a huge batch of Paula Deen’s mac and cheese, but somehow (miraculously), there’s still some left. First of all, congrats on your self-control. Second, don’t waste a single crumb! Follow these tips to store and reheat it like a pro.
Best Practices for Refrigerating Mac and Cheese
Once the dish has cooled, transfer it into an airtight container and pop it in the fridge. It’ll stay good for 3-4 days, which means you’ve got a few more days of cheesy heaven ahead of you.
To keep it from drying out, you can add a drizzle of milk or cream on top before sealing the container. Think of it as giving the dish a little moisturizing treatment. 😉
Reheating Methods That Preserve Taste and Texture
Time to heat things back up and make them taste just as good as the day you made them:
- Oven Method (Best for Larger Portions): Preheat your oven to 350°F, place the mac and cheese in an oven-safe dish, cover it with foil to avoid dryness, and bake until warmed through (about 20 minutes).
- Stovetop (Quick and Easy): Heat on low in a nonstick pan, adding a splash of milk for creaminess. Stir gently to avoid sticking.
- Microwave (For Instant Gratification): Place a portion in a microwave-safe bowl, drizzle with a bit of milk, and cover with a damp paper towel. Heat on medium for 1-2 minutes, stirring halfway.
“Leftovers might not get the red-carpet treatment, but with the right touch, they can still steal the show.”
And there you have it, my friend! From creative add-ons and perfect pairings to unbeatable storage tips, you’re now equipped to keep your mac and cheese game strong long after the first serving. Who’s ready to dig in again? 🍴

